LG301: Mechanical -
A Radio Barely Alive
The Ferguson Model 325A
Built in 1954 this beautiful device cost me £60 on eBay, the photo doesn't do it credit, you have to see it to appreciate it, you have to turn the dial to love it. I was going to turn it into a Bluetooth Speaker but it truly deserves so much more, it deserves to be tuned again.
According to Radio Museum, the 325A processes Long Wave and Short Wave using a Superheterodyne ZF/IF 470, which I have no reason to doubt, but as the UK won't be broadcasting analogue radio, one of the valves is smashed, and I put my thumb through the paper speaker cone, there isn't going to be much original technology left inside.
But what must be maintained is the feel, the clank of the mechanical switches, the weighted dial moving the tuning needle, and the nostalgia of the piece. Like with architectural restoration, we must respect the original, whilst acknowledging our own time... we pay homage to the past we don't imitate it.
Would Ferguson have used two bulbs to illuminate the dial if they could use 70 NeoPixels? I doubt it, so neither should we.
"Gentlemen, we can rebuild him...
We have the technology..." But this wouldn't be the first old speaker to get an upgrade, in fact, it's not even the first Ferguson 325a, I work with an embedded engineer who put a Bluetooth Amp in this very model. But I didn't do that did I, that would hardly be 'bionic'... I put everything in it, there was, after all, lots of room.
So What is 'the technology'?
Let's look at what we need...
- Raspberry Pi 3B - Single Board Computer
- HiFiBerry Amp 2 - DAC
- Arduino Duo - MicroController
- Arduino ProtoShield - PermaBoard
- 74 NeoPixels - RGB LEDs
- VGA Screen
- 2 Sony Car Stereo Speakers
- Adjustable Power Voltage Regulator
- 12V To 5V 5A Power Buck Module
- 2 Potentiometers, 2 Switches and a Rotary Encoder
And it still ways about half what it did before...
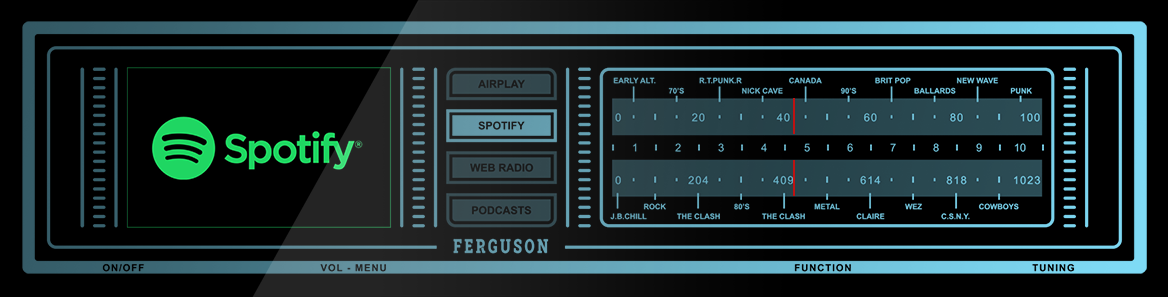
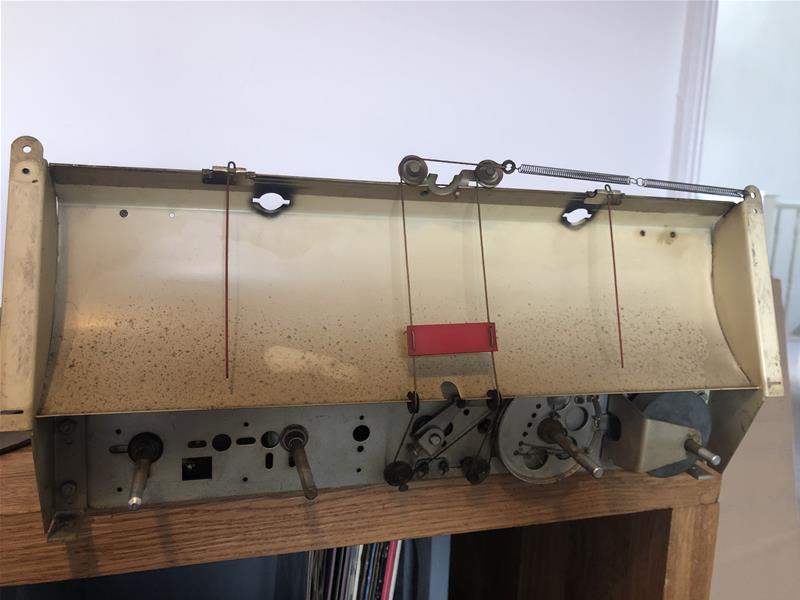
We saved the mechanical band select mechanism, we saved the weighted tuning dial and the pully system used to turn the superhet. Physically speaking the operation feels very similar to the original, which raises a huge issue for us as UX Designers, how do you control a device from the internet that has a physical state?
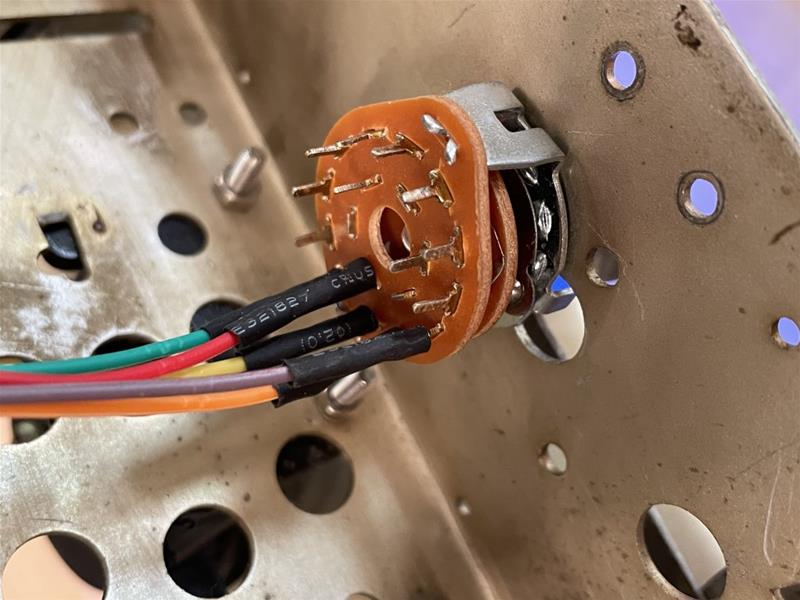
The physical needle showing through the screen design below is somewhere between The Clash and Canada. The Potentiometer connected to the other end of the mechanism is about 40% open, that's the reading the microcontroller will get... I'm expecting to hear 'Death or Glory' or 'Harvest Moon'!
But radios drifted, we had to tweak the tuning, we will approach this problem in the same way.
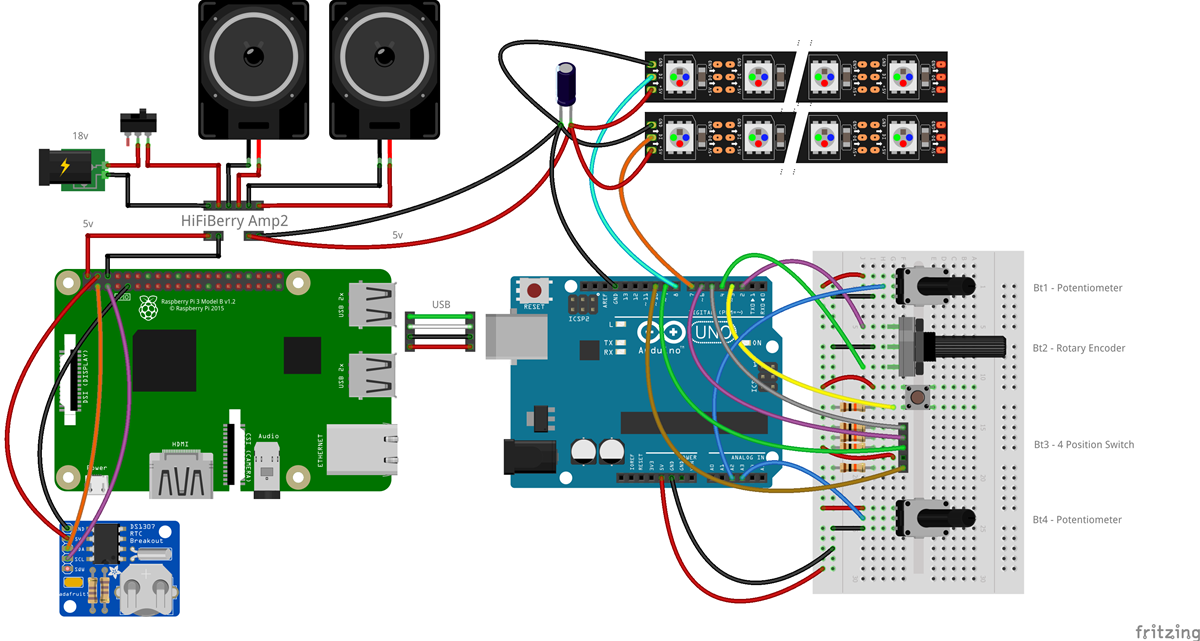
The Build
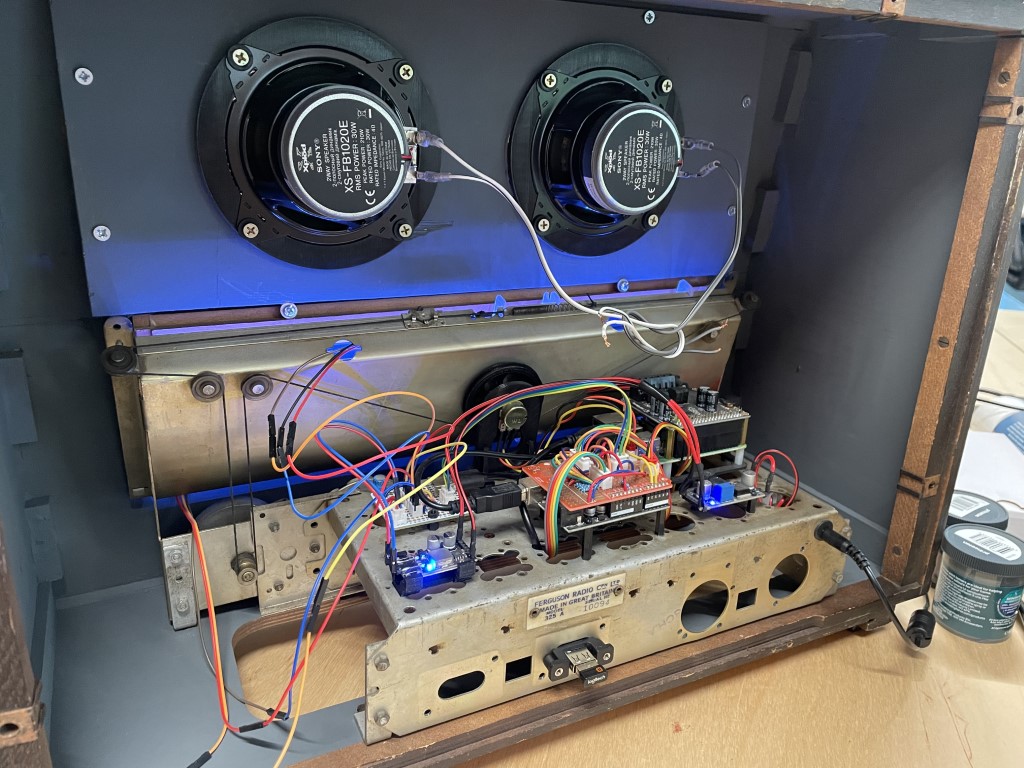
The list of components above was pretty easy to fit in the case, as you'd expect. The main challenge was finding enough pins on the Arduino and room on the ProtoHat.
The HiFiBerry Amp 2 sits on top of the Pi and powers it, I broke out another 5v supply for the Screen and the Pixels.
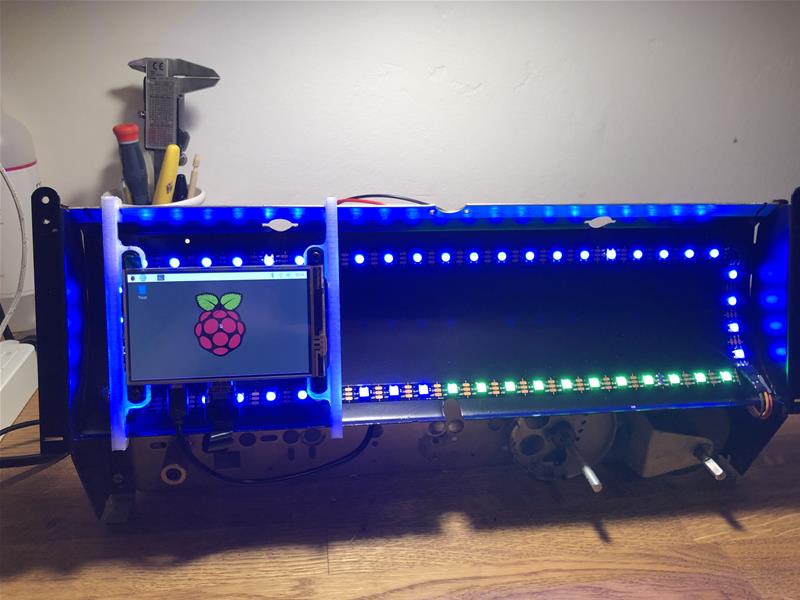
I want to keep the original component mount and use the original mounting holes to house new 3D printed mounts for the new components. This large slice of metal has made me rethink my usual policy of having breadboard wires hanging out of everything during the build!
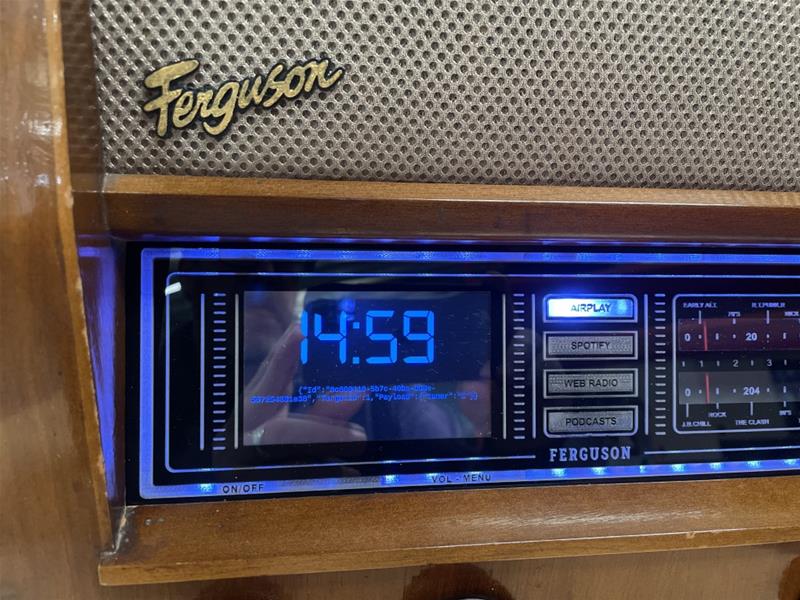
A Hybrid Display
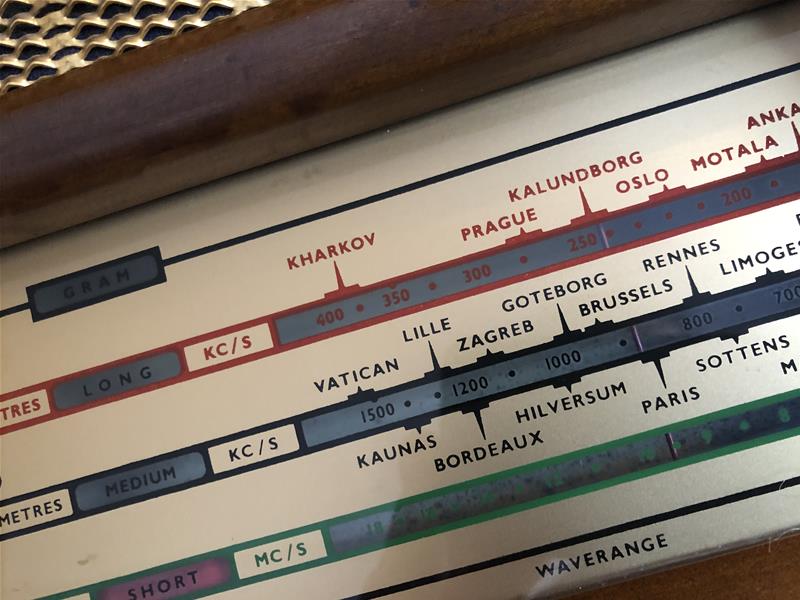
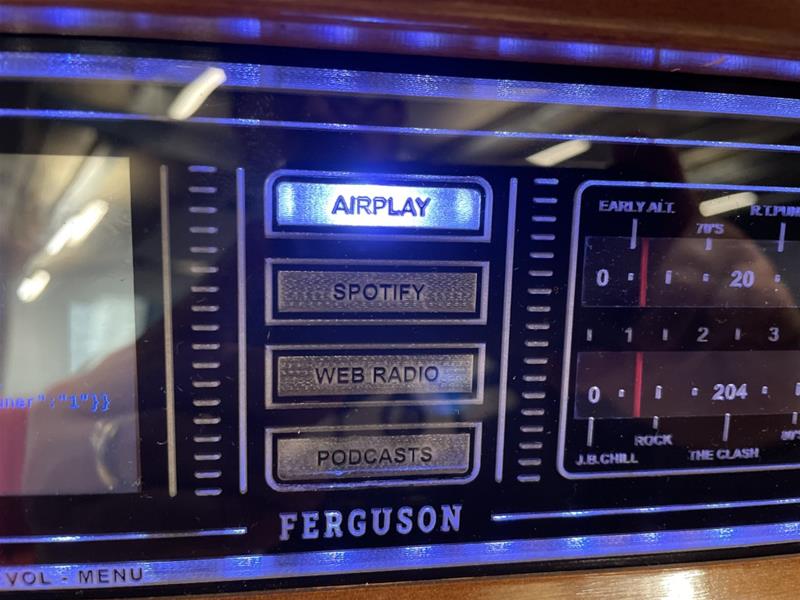
I love the original tuning display, I love that it has long deceased radio stations engraved in it for prosperity, I'm going to do the same with my playlists... This will give me the nostalgic experience of having to remember what old playlist my new playlists are under. I'll also divide the dial by 20 and display the potentiometer output as a frequency, giving the user lots of markers.
The inclusion of an HDMI screen helps justify my approach to the physical display as we can use this to inform and guide the user during the tuning process, plus I love the idea of album artwork displayed on a 1940's device. We need to design mounts for both the screen and waveband indicator.
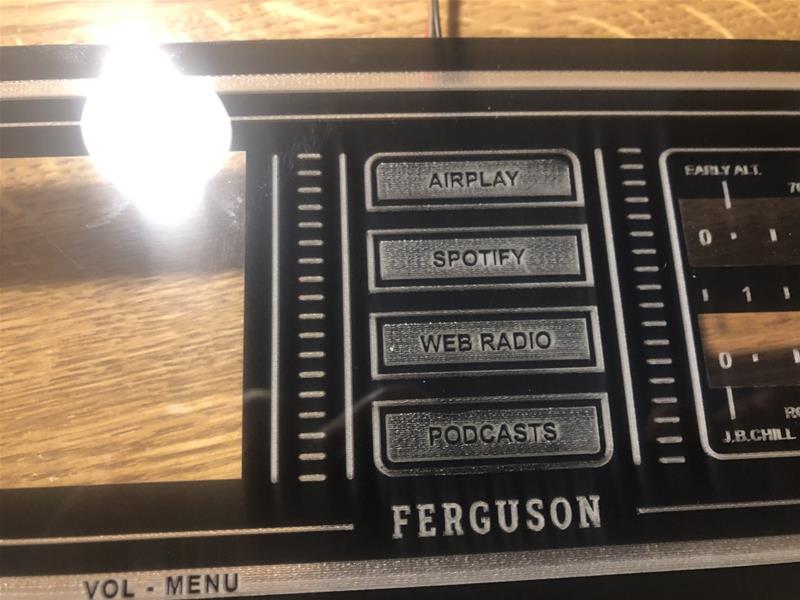
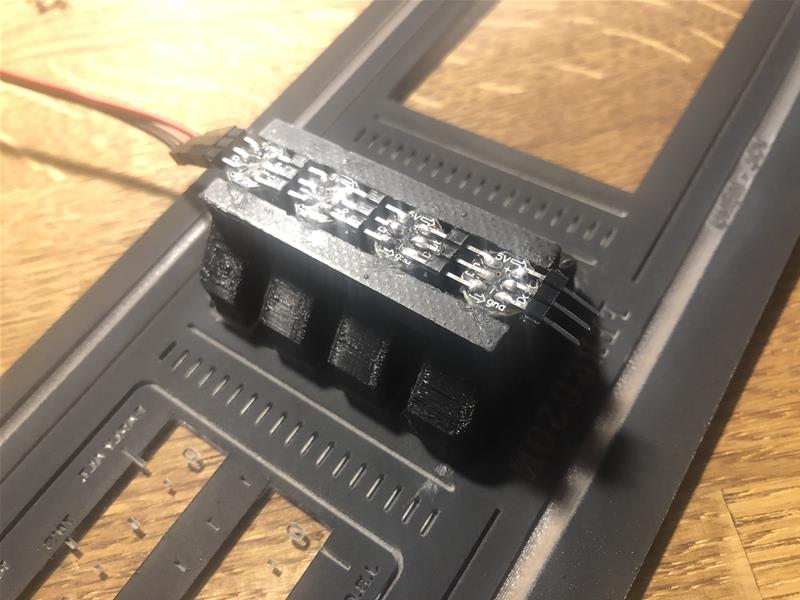
I sprayed the display holder black and arranged the NeoPixels around the edge, with the help of some 3d printed corners to keep the wiring tidy. For the display, I knew I wanted an etched effect to reflect the colour of the NeoPixels, but also needed clear areas to show the tuning needle and display.
Wet Transfer and Cut Vinyl were considered but for this level of complexity were problematic, I found a few videos of people painting and then etching acrylic sheets with laser cutters and this seemed like a perfect solution. I masked areas for the screen and tuning needle and painted the back of a 2mm acrylic sheet with black paint. Painting and etching the back would give me a shiny black screen with etched type and graphics... This is exactly what I hoped for, a modern take on a traditional design.
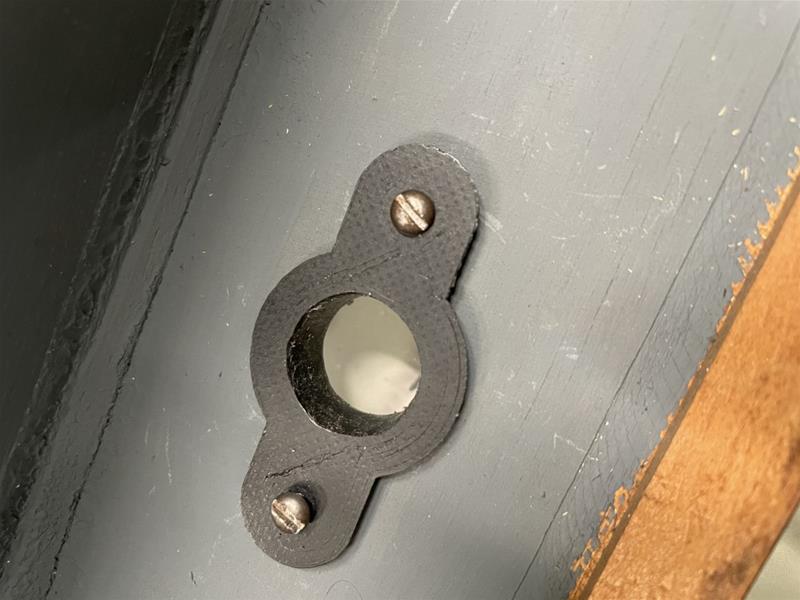
Waveband Indicator
A mechanical mechanism, operating an analogue switch, indicated by a digital response. That's before we do anything with the result.
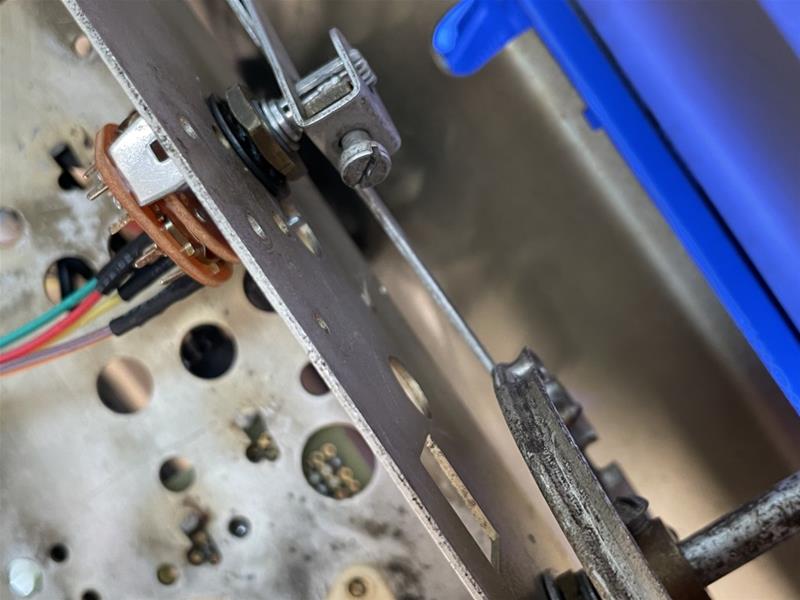
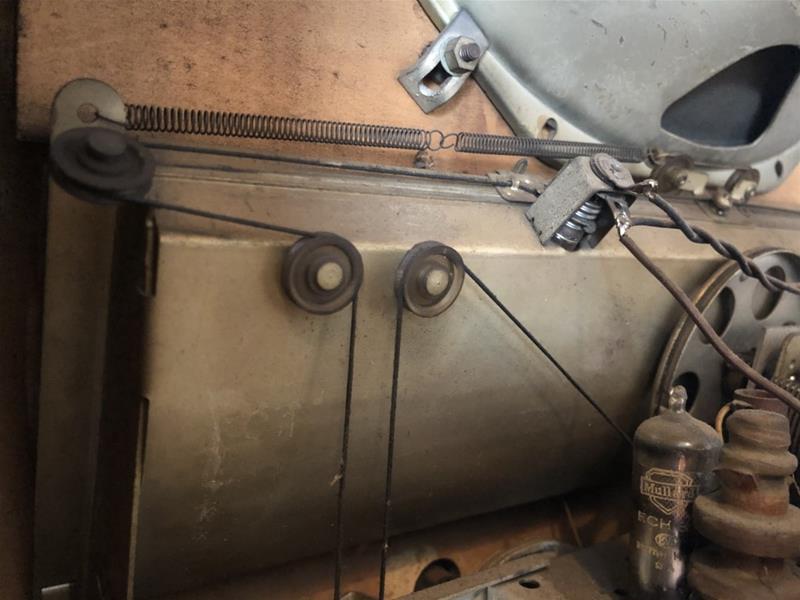
The original mechanism you can see in the photo above and detailed in the original notes attached below, is genius in its simplicity. By keeping the 4 position wheel attaching the arm to an analogue 4 position switch, we've kept the noise and feel of the original.
But we're colour theming our 'Wave Bands' (functions) so moving a red card isn't going to wash, a 3D Printed NeoPixel housing that changes colour and position on the click of the switch will have the same spring-loaded effect.
The Tuner
Being able to tune this using the original mechanism was a major factor in maintaining the user experience. What do we need to make that happen? Well, according to the manual, 72 inches of Waxed Braided Fishing Line for starters... this is amazing.
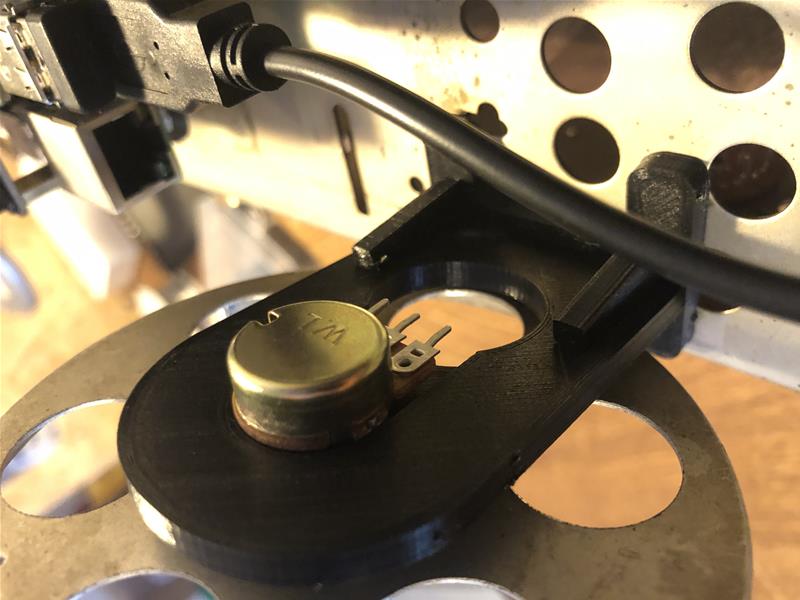
The wheel in the original mechanism turned the Superhet, we're going to turn a potentiometer further and want a similar range of movement for the tuning needle as the original... Don't cut that fishing wire quite yet!
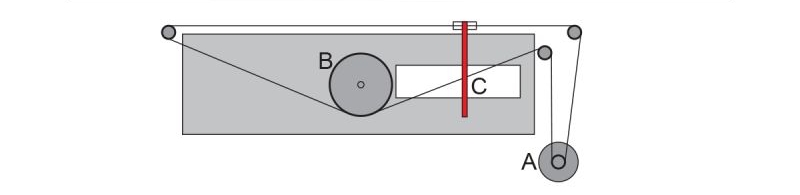
OK… So to be able to tune Spotify Playlists using the Tuning Button (A) I have connected the Button and the Dial (C) to a Potentiometer (B). The Dial needs a movement range of 133mm, the Potentiometer rotates a fixed 305 degrees. So how big does my wheel on the Potentiometer need to be….?
By my thinking... ((133mm / 305 degrees) * 360 degrees) / pi = almost exactly 50mm diameter... I’ll give that a go.
Single Button Interface
Towards the end of the last century, Sony Camcorders had a scroll and click wheel interface that drove the menus, it was surprisingly intuitive and even made its way onto a Sony Erricson phone I had in the early 2000s.
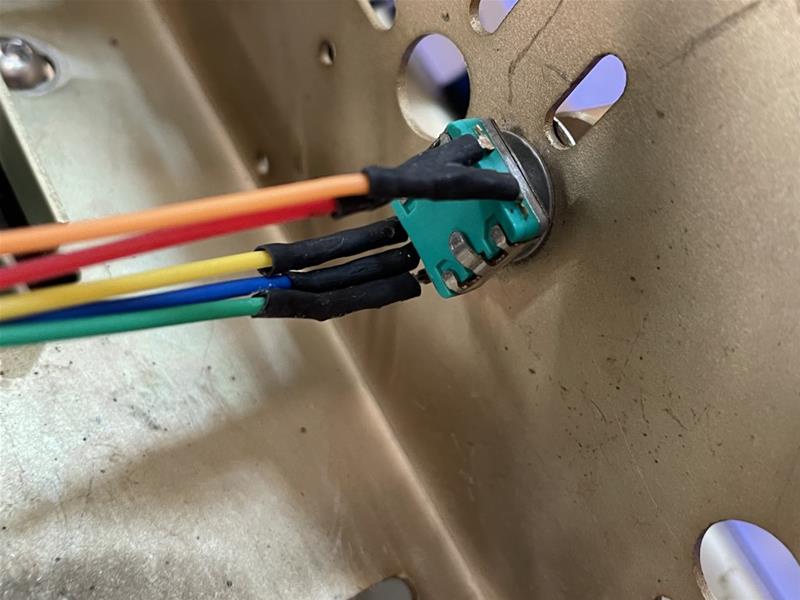
So far everything we've added has a physical state, let's add a stateless Rotary Encoder with Push Button so we can navigate and control the content on the screen. These radio buttons were never designed to be pushed so I'm designing a housing to allow for a smoother more intentional feel.
New 3D Parts
An array of mounts, spacers and even a few washers, having a 3D Printer and Fusion360 on my desk has changed how I look at problems. Nothing spectacular here, the cleverest thing was the tuning wheel and mount. I've put some of the 3D Models in the Sidebar for you to play with.
Finishing Touches
Speaker cloth, a new badge, a coat of paint inside, new feet, and a laser-cut back etched with the original circuit diagram for the 325a (thank you Radio Museum). This is built and it looks incredible, now we need to hook everything up and programme it.
I wanted to develop a way of programming embedded devices using .Net that would work for any device with any functionality, almost a Framework, this could have been anything.
The beauty of this physical piece is inspiring... Now the software has to do it justice